ایجاد گالری تصاویر در CSS
15 اردیبهشت 1398

گالری تصاویر
گالری ها (در انگلیسی: Image Gallery) در دنیای وب مجموعه ای از تصاویر هستند که روی یک وب سایت قرار گرفته اند. کد زیر مثالی از همین گالری تصاویر است:
<!DOCTYPE html>
<html>
<head>
<style>
div.gallery {
  margin: 5px;
  border: 1px solid #ccc;
  float: left;
  width: 180px;
}

div.gallery:hover {
  border: 1px solid #777;
}

div.gallery img {
  width: 100%;
  height: auto;
}

div.desc {
  padding: 15px;
  text-align: center;
}
</style>
</head>
<body>

<div class="gallery">
  <a target="_blank" href="img_5terre.jpg">
    <img src="https://www.w3schools.com/css/img_5terre.jpg" alt="Cinque Terre" width="600" height="400">
  </a>
  <div class="desc">توضیحات مربوط به عکس</div>
</div>

<div class="gallery">
  <a target="_blank" href="img_forest.jpg">
    <img src="https://www.w3schools.com/css/img_forest.jpg" alt="Forest" width="600" height="400">
  </a>
  <div class="desc">توضیحات مربوط به عکس</div>
</div>

<div class="gallery">
  <a target="_blank" href="img_lights.jpg">
    <img src="https://www.w3schools.com/css/img_lights.jpg" alt="Northern Lights" width="600" height="400">
  </a>
  <div class="desc">توضیحات مربوط به عکس</div>
</div>

<div class="gallery">
  <a target="_blank" href="img_mountains.jpg">
    <img src="https://www.w3schools.com/css/img_mountains.jpg" alt="Mountains" width="600" height="400">
  </a>
  <div class="desc">توضیحات مربوط به عکس</div>
</div>

</body>
</html>
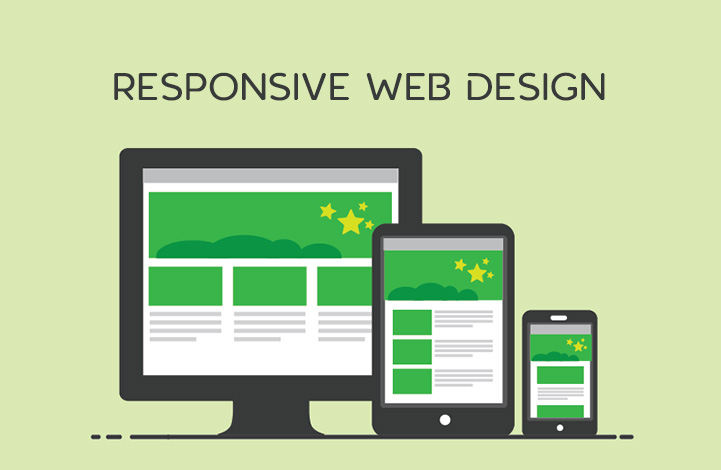
این مثال تصاویر را به صورت بسیار ساده نمایش می دهد. ما می توانیم یک قدم پیش برویم و آن را responsive یا واکنش گرا طراحی کنیم:
<!DOCTYPE html>
<html>
<head>
<style>
div.gallery {
  border: 1px solid #ccc;
}

div.gallery:hover {
  border: 1px solid #777;
}

div.gallery img {
  width: 100%;
  height: auto;
}

div.desc {
  padding: 15px;
  text-align: center;
}

* {
  box-sizing: border-box;
}

.responsive {
  padding: 0 6px;
  float: left;
  width: 24.99999%;
}

@media only screen and (max-width: 700px) {
  .responsive {
    width: 49.99999%;
    margin: 6px 0;
  }
}

@media only screen and (max-width: 500px) {
  .responsive {
    width: 100%;
  }
}

.clearfix:after {
  content: "";
  display: table;
  clear: both;
}
</style>
</head>
<body>

<h2>Responsive Image Gallery</h2>
<h4>Resize the browser window to see the effect.</h4>

<div class="responsive">
  <div class="gallery">
    <a target="_blank" href="img_5terre.jpg">
      <img src="https://www.w3schools.com/css/img_5terre.jpg" alt="Cinque Terre" width="600" height="400">
    </a>
    <div class="desc">Add a description of the image here</div>
  </div>
</div>


<div class="responsive">
  <div class="gallery">
    <a target="_blank" href="img_forest.jpg">
      <img src="https://www.w3schools.com/css/img_forest.jpg" alt="Forest" width="600" height="400">
    </a>
    <div class="desc">Add a description of the image here</div>
  </div>
</div>

<div class="responsive">
  <div class="gallery">
    <a target="_blank" href="img_lights.jpg">
      <img src="https://www.w3schools.com/css/img_lights.jpg" alt="Northern Lights" width="600" height="400">
    </a>
    <div class="desc">Add a description of the image here</div>
  </div>
</div>

<div class="responsive">
  <div class="gallery">
    <a target="_blank" href="img_mountains.jpg">
      <img src="https://www.w3schools.com/css/img_mountains.jpg" alt="Mountains" width="600" height="400">
    </a>
    <div class="desc">Add a description of the image here</div>
  </div>
</div>

<div class="clearfix"></div>

<div style="padding:6px;">
  <p dir='rtl'> این کد از media query ها استفاده می کند تا این گالری را واکنش گرا کند. برای صفحاتی با سایز 700 پیکسل و بیشتر، چهار تصویر را کنار هم نمایش می دهد. برای صفحاتی با سایز کوچک تر تصاویر را به صورت دو به دو کنار هم نمایش می دهد. در آخر اگر عرض صفحه 500 پیکسل یا کمتر باشد صفحه آنقدر کوچک می شود که تصاویر به صورت عمودی زیر هم قرار می گیرند.
  </p>
  <p dir='rtl'>درباره ی media query ها در جلسات بعدی صحبت خواهیم کرد.</p>
</div>

</body>
</html>
ما در این کد از media query ها استفاده کرده ایم تا این گالری را واکنش گرا کنیم. برای صفحاتی با سایز 700 پیکسل و بیشتر، چهار تصویر را کنار هم (در یک خط) نمایش می دهد. برای صفحاتی با سایز کوچک تر تصاویر را به صورت دو به دو کنار هم نمایش می دهد. در آخر اگر عرض صفحه 500 پیکسل یا کمتر باشد صفحه آنقدر کوچک می شود که تصاویر به صورت عمودی زیر هم قرار می گیرند.
اما آیا این حد از سادگی در دنیای مدرن امروزی قابل قبول است؟
Slideshow چیست؟
Slideshow ها نوعی image gallery هستند که به جای نمایش تمام تصاویر، آن ها را دانه به دانه و به نوبت نشان می دهند. به مثال زیر توجه کنید:
<!DOCTYPE html>
<html>
<head>
<meta name="viewport" content="width=device-width, initial-scale=1">
<style>
* {box-sizing: border-box}
body {font-family: Verdana, sans-serif; margin:0}
.mySlides {display: none}
img {vertical-align: middle;}

/* Slideshow container */
.slideshow-container {
  max-width: 1000px;
  position: relative;
  margin: auto;
}

/* Next & previous buttons */
.prev, .next {
  cursor: pointer;
  position: absolute;
  top: 50%;
  width: auto;
  padding: 16px;
  margin-top: -22px;
  color: white;
  font-weight: bold;
  font-size: 18px;
  transition: 0.6s ease;
  border-radius: 0 3px 3px 0;
  user-select: none;
}

/* Position the "next button" to the right */
.next {
  right: 0;
  border-radius: 3px 0 0 3px;
}

/* On hover, add a black background color with a little bit see-through */
.prev:hover, .next:hover {
  background-color: rgba(0,0,0,0.8);
}

/* Caption text */
.text {
  color: #f2f2f2;
  font-size: 15px;
  padding: 8px 12px;
  position: absolute;
  bottom: 8px;
  width: 100%;
  text-align: center;
}

/* Number text (1/3 etc) */
.numbertext {
  color: #f2f2f2;
  font-size: 12px;
  padding: 8px 12px;
  position: absolute;
  top: 0;
}

/* The dots/bullets/indicators */
.dot {
  cursor: pointer;
  height: 15px;
  width: 15px;
  margin: 0 2px;
  background-color: #bbb;
  border-radius: 50%;
  display: inline-block;
  transition: background-color 0.6s ease;
}

.active, .dot:hover {
  background-color: #717171;
}

/* Fading animation */
.fade {
  -webkit-animation-name: fade;
  -webkit-animation-duration: 1.5s;
  animation-name: fade;
  animation-duration: 1.5s;
}

@-webkit-keyframes fade {
  from {opacity: .4}
  to {opacity: 1}
}

@keyframes fade {
  from {opacity: .4}
  to {opacity: 1}
}

/* On smaller screens, decrease text size */
@media only screen and (max-width: 300px) {
  .prev, .next,.text {font-size: 11px}
}
</style>
</head>
<body>

<div class="slideshow-container">

<div class="mySlides fade">
  <div class="numbertext">1 / 3</div>
  <img src="https://www.w3schools.com/howto/img_nature_wide.jpg" style="width:100%">
  <div class="text">Caption Text</div>
</div>

<div class="mySlides fade">
  <div class="numbertext">2 / 3</div>
  <img src="https://www.w3schools.com/howto/img_snow_wide.jpg" style="width:100%">
  <div class="text">Caption Two</div>
</div>

<div class="mySlides fade">
  <div class="numbertext">3 / 3</div>
  <img src="https://www.w3schools.com/howto/img_mountains_wide.jpg" style="width:100%">
  <div class="text">Caption Three</div>
</div>

<a class="prev" onclick="plusSlides(-1)">❮</a>
<a class="next" onclick="plusSlides(1)">❯</a>

</div>
<br>

<div style="text-align:center">
  <span class="dot" onclick="currentSlide(1)"></span>
  <span class="dot" onclick="currentSlide(2)"></span>
  <span class="dot" onclick="currentSlide(3)"></span>
</div>

<script>
var slideIndex = 1;
showSlides(slideIndex);

function plusSlides(n) {
  showSlides(slideIndex += n);
}

function currentSlide(n) {
  showSlides(slideIndex = n);
}

function showSlides(n) {
  var i;
  var slides = document.getElementsByClassName("mySlides");
  var dots = document.getElementsByClassName("dot");
  if (n > slides.length) {slideIndex = 1}
  if (n < 1) {slideIndex = slides.length}
  for (i = 0; i < slides.length; i++) {
      slides[i].style.display = "none";
  }
  for (i = 0; i < dots.length; i++) {
      dots[i].className = dots[i].className.replace(" active", "");
  }
  slides[slideIndex-1].style.display = "block";
  dots[slideIndex-1].className += " active";
}
</script>

</body>
</html>
همانطور که میبینید این کدها شامل کدهای جاوا اسکریپت نیز می باشند و از موارد قبل بسیار پیچیده تر هستند! در واقع آموزش آنها چند جلسه ای طول می کشد و از موضوع CSS نیز خارج می شود بنابراین ما زیاد روی آن ها مانور نمی دهیم و آشنایی با این موارد را به بعد از اتمام دوره های جاوا اسکریپت، HTML و CSS واگذار می کنیم. در واقع این پیشرفته شدن تا بی نهایت ادامه پیدا می کند و انواع خلاقیت ها را می توان در آن پیاده سازی کرد.
به مثال زیر نگاه کنید:
<!DOCTYPE html>
<html>
<meta name="viewport" content="width=device-width, initial-scale=1">
<style>
body {
font-family: Verdana, sans-serif;
margin: 0;
}
* {
box-sizing: border-box;
}
.row > .column {
padding: 0 8px;
}
.row:after {
content: "";
display: table;
clear: both;
}
.column {
float: left;
width: 25%;
}
/* The Modal (background) */
.modal {
display: none;
position: fixed;
z-index: 1;
padding-top: 100px;
left: 0;
top: 0;
width: 100%;
height: 100%;
overflow: auto;
background-color: black;
}
/* Modal Content */
.modal-content {
position: relative;
background-color: #fefefe;
margin: auto;
padding: 0;
width: 90%;
max-width: 1200px;
}
/* The Close Button */
.close {
color: white;
position: absolute;
top: 10px;
right: 25px;
font-size: 35px;
font-weight: bold;
}
.close:hover,
.close:focus {
color: #999;
text-decoration: none;
cursor: pointer;
}
.mySlides {
display: none;
}
.cursor {
cursor: pointer;
}
/* Next & previous buttons */
.prev,
.next {
cursor: pointer;
position: absolute;
top: 50%;
width: auto;
padding: 16px;
margin-top: -50px;
color: white;
font-weight: bold;
font-size: 20px;
transition: 0.6s ease;
border-radius: 0 3px 3px 0;
user-select: none;
-webkit-user-select: none;
}
/* Position the "next button" to the right */
.next {
right: 0;
border-radius: 3px 0 0 3px;
}
/* On hover, add a black background color with a little bit see-through */
.prev:hover,
.next:hover {
background-color: rgba(0, 0, 0, 0.8);
}
/* Number text (1/3 etc) */
.numbertext {
color: #f2f2f2;
font-size: 12px;
padding: 8px 12px;
position: absolute;
top: 0;
}
img {
margin-bottom: -4px;
}
.caption-container {
text-align: center;
background-color: black;
padding: 2px 16px;
color: white;
}
.demo {
opacity: 0.6;
}
.active,
.demo:hover {
opacity: 1;
}
img.hover-shadow {
transition: 0.3s;
}
.hover-shadow:hover {
box-shadow: 0 4px 8px 0 rgba(0, 0, 0, 0.2), 0 6px 20px 0 rgba(0, 0, 0, 0.19);
}
</style>
<body>
<h2 style="text-align:center">Lightbox</h2>
<div class="row">
<div class="column">
<img src="https://www.w3schools.com/howto/img_nature.jpg" style="width:100%" onclick="openModal();currentSlide(1)" class="hover-shadow cursor">
</div>
<div class="column">
<img src="https://www.w3schools.com/howto/img_snow.jpg" style="width:100%" onclick="openModal();currentSlide(2)" class="hover-shadow cursor">
</div>
<div class="column">
<img src="https://www.w3schools.com/howto/img_mountains.jpg" style="width:100%" onclick="openModal();currentSlide(3)" class="hover-shadow cursor">
</div>
<div class="column">
<img src="https://www.w3schools.com/howto/img_lights.jpg" style="width:100%" onclick="openModal();currentSlide(4)" class="hover-shadow cursor">
</div>
</div>
<div id="myModal" class="modal">
<span class="close cursor" onclick="closeModal()">×</span>
<div class="modal-content">
<div class="mySlides">
<div class="numbertext">1 / 4</div>
<img src="https://www.w3schools.com/howto/img_nature_wide.jpg" style="width:100%">
</div>
<div class="mySlides">
<div class="numbertext">2 / 4</div>
<img src="https://www.w3schools.com/howto/img_snow_wide.jpg" style="width:100%">
</div>
<div class="mySlides">
<div class="numbertext">3 / 4</div>
<img src="https://www.w3schools.com/howto/img_mountains_wide.jpg" style="width:100%">
</div>
<div class="mySlides">
<div class="numbertext">4 / 4</div>
<img src="https://www.w3schools.com/howto/img_lights_wide.jpg" style="width:100%">
</div>
<a class="prev" onclick="plusSlides(-1)">❮</a>
<a class="next" onclick="plusSlides(1)">❯</a>
<div class="caption-container">
<p id="caption"></p>
</div>
<div class="column">
<img class="demo cursor" src="https://www.w3schools.com/howto/img_nature_wide.jpg" style="width:100%" onclick="currentSlide(1)" alt="Nature and sunrise">
</div>
<div class="column">
<img class="demo cursor" src="https://www.w3schools.com/howto/img_snow_wide.jpg" style="width:100%" onclick="currentSlide(2)" alt="Snow">
</div>
<div class="column">
<img class="demo cursor" src="https://www.w3schools.com/howto/img_mountains_wide.jpg" style="width:100%" onclick="currentSlide(3)" alt="Mountains and fjords">
</div>
<div class="column">
<img class="demo cursor" src="https://www.w3schools.com/howto/img_lights_wide.jpg" style="width:100%" onclick="currentSlide(4)" alt="Northern Lights">
</div>
</div>
</div>
<script>
function openModal() {
document.getElementById('myModal').style.display = "block";
}
function closeModal() {
document.getElementById('myModal').style.display = "none";
}
var slideIndex = 1;
showSlides(slideIndex);
function plusSlides(n) {
showSlides(slideIndex += n);
}
function currentSlide(n) {
showSlides(slideIndex = n);
}
function showSlides(n) {
var i;
var slides = document.getElementsByClassName("mySlides");
var dots = document.getElementsByClassName("demo");
var captionText = document.getElementById("caption");
if (n > slides.length) {slideIndex = 1}
if (n < 1) {slideIndex = slides.length}
for (i = 0; i < slides.length; i++) {
slides[i].style.display = "none";
}
for (i = 0; i < dots.length; i++) {
dots[i].className = dots[i].className.replace(" active", "");
}
slides[slideIndex-1].style.display = "block";
dots[slideIndex-1].className += " active";
captionText.innerHTML = dots[slideIndex-1].alt;
}
</script>
</body>
</html>
به این مثال Lightbox می گویند که حتما آن را در سر تا سر اینترنت دیده اید. به هر حال امیدوارم در این قسمت با پایه ی بحث و حالت کلی آن آشنا شده باشید و در آینده طرح های حرفه ای بسازید.

دورههای آموزشی مرتبط

مقالات مرتبط
17 اردیبهشت 1401
15 اردیبهشت 1401
11 بهمن 1400
07 اردیبهشت 1400
09 مرداد 1399
آخرین سوالات کاربران
alisadinm90 در 3 سال قبل پرسیده:
alidniry در 3 سال قبل پرسیده:
sepehr_sedigh در 3 سال قبل پرسیده:
fatehin در 3 سال قبل پرسیده:
amir4784 در 3 سال قبل پرسیده:
ما را دنبال کنید


در این قسمت، به پرسشهای تخصصی شما دربارهی محتوای مقاله پاسخ داده نمیشود. سوالات خود را اینجا بپرسید.